Saturday, September 10, 2011

Practice 04 - Offset-Path Sweep

So you probably already know how to create a Swept Boss/Bass. Sketch a 2D profile on one plane, then in another sketch on a perpendicular plane, starting from the center of the profile, sketch a 2D/3D path you want it to follow. Easy, right?

Well, in this exercise you'll learn that the path doesn't have to attach to the center of the profile.

Start off by making your path. You usually want to start with the profile, but doing it this way will make it easier to understand at first glance.
Click image for full view

Start your drawing from the Origin, as shown above. Add a curve or bend, just to make it interesting.
  When you're done, hit Rebuild to exit the sketch. Make sure any curves you add are tangent to any attached line.

Start a new sketch on the appropriate plane, draw a circle and define a wall thickness. Attach the very bottom of the circle (Instead of the center.) to the Origin. As shown below.

Click Image for full view
Next, initiate the sweep.
Click Image for full view

Wherever the profile is attached, (in this case, the bottom of the circle) will follow along the determined path respectively.
Click Image for full view
This method is useful for the semi-rare circumstance where you know the inside radius (or outside) of a bend, but not the exact center.

Click to animate


Feel free to comment or leave any feedback.
Talk to me if you have any special topic requests.

If you're confused or having trouble and need assistance, talk with another apprentice to see if they can help, or you can call/text/email me any time I'm not in the shop.

Saturday, August 20, 2011

Practice 03 - Half-assed Loft walk through!

Three planes.Make sketches on all three.

LOFT

Questions or comments? Leave a comment.

Exporting DXF Files

For this exercise you'll be making a dropout. Simple. I'll then walk you through the process of exporting the Solidworks model as a DXF file. This is useful to know for when you want order parts to be laser cut.


First off, make a Long Haul/Express dropout.


Some can usually be found on the shelf with all the other laser-cut parts.


Once finished, make sure to save.


Make a new drawing and import the part, or click the "Make drawing from part" button.


Insert a side view of the part, and delete the sheet format.
This will get rid of the text and other stuff in the background.


The view should be of the side, essentially blank.
Make sure it's 1:1 scale, otherwise the piece may come back too big, or too small, or just not fit right.

It's also good to note that some laser cutting job shops may require more information such as dimensions to be visible. If that's the case, get your Smart Dimension tool and throw on all the info needed.


Once the drawing has everything it needs, you want to export it to a DXF file. DXF files are very basic Autocad drawing formats that are standard for most places.

Click File>Save As, and simply change the filetype to Dxf.

Send it to the shop through email, and specify the material and thickness in the message for your price quote.

Express/Long-Haul Stay Tubes

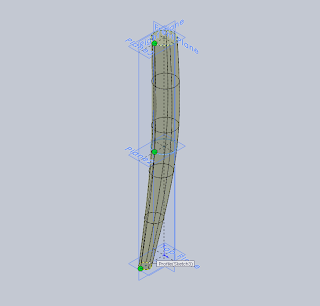
In this exorcise I'll be posting images with bits of information. It'll be up to you to make sense of it. You'll be tasked with figuring out how everything goes together, and how to work within a 3D Sketch. That's right, 3D Sketch. It is possible to make this part using a series of different extrudes and angles, but you'll be doing it all as one Swept  feature.

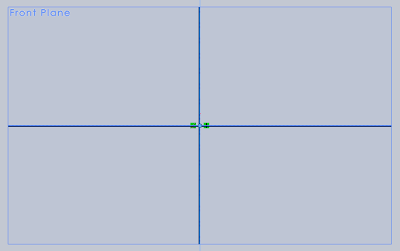
Start your tubing profile sketch on the front plane
Click to enlarge

Easy. 3D sketching, not so much. Start a new 3D sketch, it doesn't matter if you pick a plane or not. Draw out your path, making sure to utilize reference geometry.

Refer to the images as needed.


Don't worry if you can't finish, or are too confused. We'll be going over it in class later, and I'll answer any questions and point out useful tips. We'll need this to complete our Express assembly.

It would also be a good idea to get one from the shop to look at.

Saturday, July 16, 2011

Practice 02 - Crown Race

Welcome to the second Solidworks Practice assignment. For this assignment you'll be making a physical piece. You will need calipers to get dimensions, and the piece which is located with the other practice pieces.


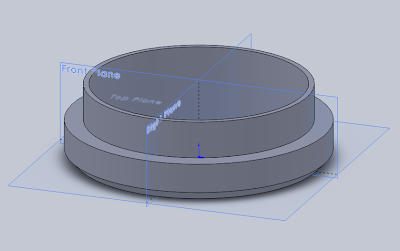
Find the crown race piece (Shown in the image) with the other practice pieces.


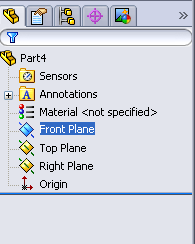
Start a new part, and sketch on the Front plane
The feature you're going to use is called the Revolve feature.


Start by making a Centerline.


↓↓↓↓


 In the PropertiesManager is a check-box that says "Infinite Length". Make the Centerline infinitely long by checking that box.


↓↓↓↓


Next, attach it to the Origin. Doing this marks the center of the piece at the Origin.


Next, use the Line tool to start drawing the cross sectioned profile of the crown race. 


This image will give you a better understanding of what that means.


Use your caliper to get all the dimensions you need to fully define the sketch. Refer to the image if you need to.


After you fully define the sketch, select the Revolve feature and revolve a full 360ยบ


It's almost done. Just needs one more little detail, which is the Chamfer on the bottom edge to accommodate a weld later in production.


Start by selecting the the bottom edge.


And simply select the Chamfer feature.


The distance to input is around .05in. It's going to get filled in by a weld, so the size of the chamfer is by no means critical.


The piece is now finished. You can add a material if you so choose.The closest thing to Chromoly in Solidworks right now is called Alloy Steel. With the material properties applied, it will allow you to view the weight as well as run strength and load-bearing simulations.


Make sure to save your work often!

Feel free to comment or leave any feedback.
Talk to me if you have any special topic requests.

If you're confused or having trouble and need assistance, talk with another apprentice to see if they can help, or you can call/text/email me any time I'm not in the shop.

Tuesday, July 5, 2011

Practice 01 - (3/4 x .049 Tube)

Welcome to the first Solidworks Practice assignment. This blog is designed to keep your skills sharp between classes, as well as get you used to Solidworks functionality and terminology. Most of the actual teaching of key functions and technique will be done during class, but with everything that you'll be doing, it can become easy to forget things. Practice makes perfect, so lets get started.


Start Solidworks if it's not already open, and select File>New>Part


It should open to a blank template with the three planes and origin showing.


In this practice session you'll be making a 5 inch long piece of 3/4 x .049 tubing.
You first need to sketch out a 2D profile of the tube. To start sketching, select a plane. In this practice guide, I recommend the Front plane.


Select the Front plane by clicking the border of it, OR through the Feature Manager on the left-hand side of the screen.

Now click the Sketch Icon near the top of the screen to start sketching on the Front plane.


It should automatically bring you to a Normal view of the Front plane.
Like so.


Where the two other planes intersect is the Origin. 


Using the Circle tool, sketch a circle from the Origin.


Make sure you start by clicking the Origin to insure the circle's center is Coincident with it.


Once the circle is sketched, you need to define it by giving it a dimension(size)
Select the Smart Dimension tool(Next to Sketch) and click the circle. The Smart Dimension tool will automatically assume you want to give it a diameter.


Ignore the number that shows up, as it will be changed.


Click to drop the dimension somewhere, and a pop-up window will appear


This diameter will be the O.D. (Outer Diameter) of the tube, which is 3/4. So type in ".75" and hit Enter. Alternatively, you can type "3/4" and it will calculate the desired value.


Once you hit Enter, it will automatically re-size the circle to be the right diameter. As you can see, I sketched mine too big, so it shrunk down to 3/4''.


Use the mouse scroll wheel to zoom in or out to make the circle fit neatly on the screen.


(If you hold the mouse wheel in and move it, you'll spin around the 2D Sketch in a 3D view. If you do that and need to get back to the normal view, click your Front plane and click Normal To in the view pallet.)


Next up, the I.D. (Inner Diameter). You're not actually going to make an I.D. because you want to set  a wall thickness of .049''. Which will take care of the I.D.


Click the circle to select it, and with it selected click the Offset Entities tool.
By default, it will offset to the outside. So after you type in your wall thickness of .049, click the Reverse check-box.

That will make it offset to the inside, which is what you want.


The Sketch should now be done. All you need to do now is Extrude the 2D profile into a 3D shape. Do that by clicking Extruded Boss/Base.


It will show a preview like this, and default to .1in.

You want your piece to be 5 inches long, so type in "5" for the value.


Once you input the value of 5, press Enter once to update the preview.


Press Enter one more time, or click the green check-mark either in the corner of the preview screen, or in the Property Manager to confirm the feature.

The part is now finished. Save it in your folder as Practice_Tube_1.SLDPRT.


Remember to save your work often to avoid data loss during power failure, or imminent system crash.


Congratulations, You're done.

Feel free to comment or leave any feedback.
Talk to me if you have any special topic requests.

If you're confused or having trouble and need assistance, talk with another apprentice to see if they can help, or you can call/text/email me any time I'm not in the shop.